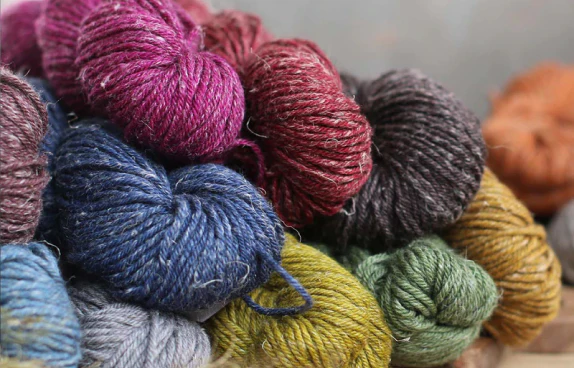
All patterns are delivered automatically as digital downloads. Wide range of sizes and tutorials included.
Normally when you work a cast-on it is complete and you won't return to it. A provisional cast-on is a little different, you are able to undo it and knit from the cast-on after you are finished.
There are several different situations where this is useful:
The two types of Provisional Cast-On I use most often are the Crochet Method (plus how to undo) and the Invisible Method.
When you work a provisional cast-on you will be working in the other direction. For this reason you will be 'between' the original stitches so you will need to pick up the edge loop to ensure you have the same number of stitches.
If you are working a stitch pattern ensure that it works from the other direction. It is best when you start work from a provisional cast-on to use a different stitch pattern.
I frequently use a provisional cast-on to join seamlessly. I've used it when working projects from side-to-side:
When you have finished knitting it is then time to block your knit. How you block will depend on the project type you have created. The purpose of blocking is to even out your stitches and make your finished knit as attractive as possible. For plain stockinette (stocking) stitch you want to pin the edges to prevent curling and even the stitches. For cables blocking will allow uneven stitches in the cables to straighten out. You do need to take care not to stretch the cables too much however. When blocking lace you will have the most dramatic difference. Lace is unimpressive until blocked. You stretch it very far and pin it which opens it all out and totally changes the fabric.
Main blocking techniques:
With wet blocking you soak your knit in a wool wash with lukewarm water. When it's been soaking for at least 30 minutes you will gently press it out between towels to remove the excess water. Do not wring it out! If you have control over your washing machine spin cycle you can also use this at a very low setting. Take great care though as if you spin to vigorously you will felt your garment.
Now you need to open out your knitting and even out your stitches. For most knitting you just smooth it out and pin the edges to stop it curling. For lace knitting you will have to stretch it out (using pins and blocking wires) to really open it up and create an attractive lace finish.
My preference is for wet blocking but if you are in a hurry or if you want to block, to check the length, as you work then steam blocking is very useful. You can use either a special steamer or else the steam setting on your iron (without touching the fabric).
You can pin one end of your work and then gently stretch out your work as you steam it, pinning it in place when it's finished. As it only gets slightly damp it is much faster than wet blocking.
Short rows are a little bit magical. You are simply turning your work before you get to the end of a row and working back in the other direction. The reason it can become a bit more difficult is in hiding that turn. If you don't do anything other than turning our work you will have a hole. This is because there is a height difference between one row and the next. All of the methods used for short rows are different ways in which you can hide that gap.
Wrap & Turn, Japanese and Yarnover methods all create a small loop of yarn that you can work together with the next stitch to close the gap. German Short rows pull the row below up, and hide the gap that way. Shadow wraps work a lifted increase into the next stitch that is knit with the stitch to close the gap.
Some more Short Row Knitting Tutorials:
If you want to go more in-depth with your short rows you can find our Masterclass here.
If you want to twist a stitch you will work it through the back loops. This is fairly easy for a knit stitch but the technique is a bit trickier for a purl stitch.
You will need to bring your right needle to the 'knit' side of your work away from you, put the tip into the back of the stitch from the right to the left and purl that stitch.
It is an awkward maneuver but it will allow you to twist a purl stitch.
Read our Knit Basics Purl Stitch Tutorial
When you knit you can hold your yarn in either your right hand or your left hand. If you hold it with your left hand this style is frequently known as Continental style knitting or 'picking'.
When you hold you right hand, if you move your whole hand to work the stitch this is know as English Style or 'throwing'. However if you sit your needle in the 'crook' of your thumb and index finger (or with long needles tuck the tip under your arm) you can then just move the tip of your index finger up and down to create your stitches. This is also known as 'Flicking'.
See both Knitting Styles in action here:
To create stockinette or stocking stitch (st st) you will create a fabric that is smooth on the front (right side) of your work and bumpy on the back (wrong side) of your work.
If you are working flat this is created by working the knit stitch on the right side of your work and purl stitch on the wrong side of your work.
If you are working in the round you will knit all the stitches because you are always working on the right side of your work.
Learn how to knit Garter Stitch. This is the most basic of the knitting stitches, you knit all the stitches on both the right and wrong side of your knitting!
It is possible, once you have learned the basics to add more finishing details which would add slip stitch edges or I-cord edges to create a more finished edge to your work.
When you have finished your knitting you will want to anchor the final stitches in place to that your knitting does come undone. In the US this is known as binding off and in the UK it's called casting off. There is a standard bind-off that is used in most circumstances that I will show you here but you can also find a full range of different bind off types here which are very useful in different, more specialised circumstances.
Check out some more tutorials for specific Bind Off / Cast Off techniques:
To create twisted ribbing in your work you will combine knit and purl stitches in 'columns' and the stockinette stitch columns will all be worked through the back loops (tbl).
This type of ribbing is usually done as 1 by 1 Ribbing. It's most commonly used for the cuff of socks as it creates a firm edge that is less likely to stretch out of shape as much. The twisted stitch columns form an attractive design feature.
1x1 Twisted Ribbing will look a little differently depending on whether it's worked in the round of flat.
Worked flat you will be working the knit stitches on the RS through the back loops but on the WS you will be working the purl stitches through the back loops.
Worked Flat
Row 1 (RS): *K1 tbl, p1; rep to end.
Row 2 (WS): *K1, p1 tbl; rep to end.
Worked in the Round
Rnd 1: *K1 tbl, p1; rep to end.
See it in a video here:
To create ribbing in your work you will combine knit and purl stitches in 'columns'.
Ribbing can be and number of combinations of knit and purl stitches. For instance, 1 by 1 Ribbing combines 1 knit stitch and 1 purl stitch. 2 by 2 Ribbing combines 2 knit stitches with two purl stitches.
So for 2 by 2 Ribbing it would look like this in the pattern:
Row 1 (RS): *K2, p2; rep to end.
Row 2 (WS): *K2, p2; rep to end.
See it in a video here:
If you're new to knitting, welcome along to the start of a wonderful journey! It can be very intimidating to start with but once you get to grips with the basics you'll soon be flying along.
There are two basic stitches; knit stitch and purl stitch. These can be combined in many different ways to create different stitch patterns and effects. The knit stitch is 'smooth' under the needle and the purl stitch creates a 'bump' just below the stitch on the needle.
When you begin knitting you start with your stitches on the left needle. As you work each stitch by wrapping yarn through the first stitch it will transfer over to the right needle. When you are finished you will turn to the other side and start again!
The front of your work (as you view it) is know as the Right Side (RS) of your work. The back/private side is known as the Wrong Side (WS). If you are knitting in the round you will always be working on the Right Side, round and round in circles.
To start your knitting you will have to put stitches on your needle. This is know as casting on. When you are finished knitting you need to anchor all of the stitches so they don't come undone. This is know as binding off (in the US) or casting off (UK).
The two most basic stitch patterns are garter stitch and stockinette (or stocking) stitch (st st).
Garter stitch is created by knitting every stitch on both the right and wrong side row. St St is created by knitting on the right side and purling on the wrong side.
So this gives you a very quick overview of the different terms. Come jump into this video to see some of them on the needles.
When you learn to knit the first stitch you will work is the knit stitch. After this will come the purl stitch. This creates a stitch with a 'bump' on the front.
Let us guide you through the easiest way to do this!
If you hold your yarn in the right hand:
If you hold your yarn in the left hand:
Watch more tutorials about the purl stitch:
Helping Hand or Knit-curious?
Do you need a helping hand with a new technique? Are you curious about other techniques or are you ready to get a little spicy with your knitting? Come check out our extensive free tutorial collection here!
We have easy step by step guides/video tutorials on everything from casting on, bind off, short rows, cables and more. As is Carol's style, everything is ready for you in bite sized videos of ten minutes or less so that you can make the most of the time you have available. So what are you waiting for? Let's dive in now:
Abbreviations got you stumped?
Starting your knitting adventure can be a little daunting especially when it comes to knitting terms and abbreviations. Don't worry, we've got your back. Check out our list of common abbreviations here so that you can take your next knitting steps with ease and confidence.
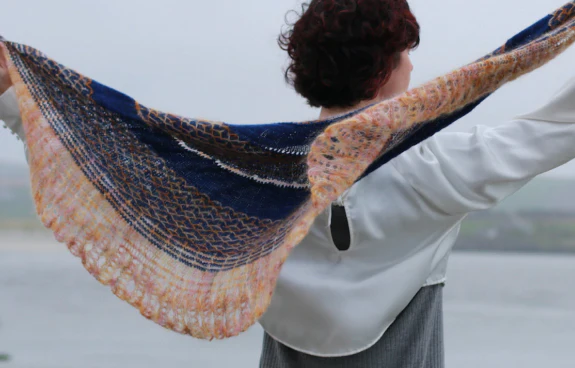
Finally we come to putting it all together!
On this page you'll find a collection of patterns that will be suitable for a newer knitter. Here you'll find garments and accessories that help you take your knitting skills to the next level.